Teaching with Zoom
Instructional designer Rubaina Khan shows us the ropes on how to use Zoom for teaching online!
About Rubaina Khan - M.A., M.Sc.
Rubaina is a PhD student at the University of Toronto (OISE). She's done extensive work as an instructional designer for online learning, and her research interests involve: learning communities, online learning, and engineering education.
Missed the live session? Watch it here!
Review the session's slidedeck
Webinar Agenda
Before you begin: Is Zoom right for you?
Before implementing Zoom this term, please:
- Consider using an institutionally supported webinar tool (like Bb Collaborate) (see which webinar tool should I use (and when)?)
- Reflect on whether a self-managed Zoom account is right for you (see FASE's Zoom Guidelines on the Engineering Hub)
- If you’d like to proceed, you can request a pro (up to 300 participant) Zoom account (see ACT's Zoom Information pagefor more information on Zoom and to activate your Zoom account)
- Read the guide to administering Zoom in your classroom(which includes how to record and share the recording with your course)
Setting Up
Zoom Invites
When you receive an invite to a Zoom meeting, you will see a Zoom link, the meeting ID, and sometimes a passcode. You may also see a phone number - this allows you to dial-in using your phone in the case of connectivity issues.
To join, you can click on the Zoom link. This will redirect you to the Zoom Web Portal. From here, you can simply type in your name and join the meeting.

You can also join through the desktop application. To start, sign in to the Zoom app and click on the Join button. Enter the meeting ID (provided on the invite) and set your name. It's best to use a name that's recognizable to the host, as they may reject you if they are unsure of your identity.

Zoom Meeting
Take a look at the bottom left corner. If you see a red line crossed over your microphone, it means you are muted. If it is absent, you can click on the microphone icon once to mute yourself. You can also set a virtual background by clicking on the arrow on the top right corner of the Camera icon.

Take some time to play around with virtual backgrounds! They're very fun to use - you can use one of the backgrounds included with Zoom or upload your own. U of T Engineering has provided us with some fun virtual backgrounds anyone can use!
Scheduling Your Zoom Meetings
You can set up recurring meetings so students can use the same invite link for every lecture session (this helps declutter everyone's inbox). You can make the session extra secure by setting up a meeting password or only allowing authenticated users to join.

Interactive Tools
Zoom has a variety of tools to aid you in teaching online. Implementing these tools right can help better organize your lectures and promote student engagement.
Share Screen
Zoom allows multiple people to share their screens at once. If you have two devices, this can be particularly useful! Don't forget to select the Share Computer Audio box if you plan on playing a video or something with sound!

Whiteboard
Whiteboard allows you and your students to - you guessed it - draw on a white screen. You can also:
- Select and move all drawings
- Show names of annotators (to demotivate causing chaos)
Please be aware that Zoom does not automatically save a whiteboard - you must save it manually by clicking the Save button on the right side of the toolbar.

Breakout Rooms
Please note that Breakout Rooms cannot be recorded. However, they are still a great way to encourage discussion amongst small groups of students. With Breakout Rooms, you can:
- Assign your students automatically or manually into small groups
- Set up a countdown timer to end the Breakout Room (so your students won't be in mid-sentence when they're pulled back)
- Broadcast Message to All so all participants in breakout rooms will see your message.
- Be notified if a student needs help when they click the Ask for Help button

Polls
Polls can be created ahead or during the session. You can choose to make your polls anonymous. After students finish answering the poll, you can also choose to display everybody's results. You also have the ability to download a report of polling after the meeting.

Non-Verbal Interactions
Participants have the option to use non-verbal interactions such as Yes/No, Faster/Slower, or Raise Hand. You can also manually lower hands and mute participants.

Chat
The chat will be the primary way for students to communicate with you and with each other. By default, attendees will be able to chat with everyone publicly and privately. You can turn off private chat to prevent students from having 1-to-1 conversations with each other during the session.
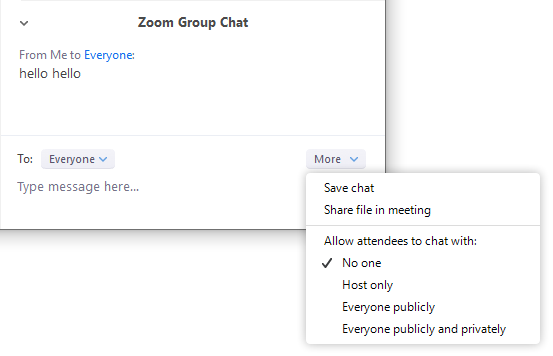
You must save the Zoom chat manually by clicking on the three dots on the right of the screen, then Save chat.
Recordings
You can either save your Zoom recording locally or to the cloud. Zoom education accounts have half a gig of storage with a 120 day retention period of cloud storage. Once a recording is saved to cloud, you can watch, download, or delete it. To prevent recordings from being accidentally deleted, we encourage you to save your recordings locally.

Don't forget to click Record to start recording!

Q&A
Here are some questions asked by participants during the session:
How do you send files to each Breakout Room?
-
To do this, you must manually enter each Breakout Room and add the file
- Open the Breakout Rooms window
- Enter a Breakout Room
- Click on the File button on the bottom right of the Chat tab and select the file you'd like to share
- Repeat for every Breakout Room
- You can also post the file in the main chat before opening the Breakout Rooms
How do you keep chat visible on your screen while screen sharing?
- Chat can be opened as a pop-up window by pressing More, then Chat on your toolbar while screen sharing
- You can drag the pop-up window or resize it - participants cannot see this pop-up (even if it's on top of the application being shared)
For any additional questions, please contact us at fase.edtech@utoronto.ca. We’re also happy to schedule consultations for your course.