
ETO’s Education Media Specialist, James, shares behind-the-scenes hardward upgrades that improve our production quality of "talking-head" educational videos. We'll use a recent example, a video created for Professor Alan Chong from Institute for Studies in Transdisciplinary Engineering Education and Practice (ISTEP). James will discuss the technical setup for lighting, audio and camera, and how each contributes to the quality of the final video.
Professor Alan Chong came to the ETO to film a short educational video on making better conference presentations. Professor Chong envisioned this as a “quick tips” video that would serve as a preview for in-person workshops that dive much deeper into the topic. In this blog post, we'll review how we set up this shoot to achieve our goals for this video.
Watch the final video
Let's dive deeper
Lighting dictates the look

Lighting arguably dictates how a video will look. With our studio’s recently upgraded lighting equipment, we were able to fully control and finetune how Professor Chong was lit.
We used three-point lighting for the shoot—a key light, a fill light, and a rim light.
Both the key light and the fill lights were 85cm parabolic softboxes each mounted on a COB (chip-on-board) light from SmallRig. The fill light was set to a lower brightness level than the key light to add some depth to the subject.
This setup produces significantly better-looking videos compared to the single, undiffused LED light stick ETO previously used for lighting videos. The three-point lighting setup gives the subject a three-dimensional look, allowing them to be separated from the background, which not only looks visually pleasing, but also makes removing the green screen in post-production much easier.


The large-diameter parabolic softboxes produce diffused (i.e., soft) lighting, which is flattering on human skin.
The softboxes' round shape also functions as catch lights, where they reflect in the subject's eyes, making them look more "alive."
Prior to the equipment upgrade, we had to keep the overhead room lights on because the LED light stick alone was not sufficient to properly light the subject. Not only did these two light sources have different color temperatures, but they were also undiffused. This caused issues like reflections on the subject’s glasses, bright spots, harsh shadows, and yellowish lights on the subject.
Our upgraded lighting equipment allowed us to turn off all other light sources that we cannot control, thereby preventing any of these issues from occurring.

Boom over lav for audio

To record Professor Chong’s voice, we opted to boom a high quality microphone (Sennheiser MKE 600) instead of using a lavalier microphone. To “boom” a microphone simply means to place the microphone above the subject.
While lav microphones have their advantages, voices recorded with them tend to sound too close, unnatural and one-dimensional. If the subject moves a lot while speaking, sometimes the lav microhpone would even capture unwanted noises from the clothing rubbing together. Voices recorded with a microphone positioned above the subject (a.k.a. “boom mic”) will typically sound more natural and have more depth and richness to them.
However, compared to using a lav microphone, which is as simple as clipping it on the subject’s clothing, booming a mic is a much more advanced and finicky technique, requiring multiple factors to be taken into account. For example, the boom mic needs to be strategically positioned to get the cleanest audio and to minimize room reverberations. Unless a room is acoustically treated, it may not be suitable for booming a mic at all.
Camera settings for better green screen removal


We recorded Professor Chong with the Sony A7CII in 4K resolution that's oversampled (or “scaled down”) from the camera's 6K sensor, which means we got exceptional image sharpness that allowed us to cleanly remove the green screen in post-production with well-defined edges of Professor Chong's outline. Previously, the ETO was using camcorders that could only record in 1080P and preserving the fidelity of the subject’s edges in the green screen removal process was much more difficult.
The extra resolution also gives us the option to punch in (i.e. crop in) the frame without the video looking grainy.

The brightness of the green screen is another crucial factor in ensuring a clean green screen removal. The brightness should be completely uniform across the frame because inconsistencies will make it harder to cleanly key out (i.e., remove) the green screen.
Many camera lenses naturally darken the corners and edges of a shot (a.k.a, “vignette”) due to limitations in lens design, which isn’t an issue in most cases, and it’s often regarded as a style, but for green screen, the vignette makes it harder for a clean removal since the brightness level is not uniform.
One of the things we do to circumvent this is to use Super 35 mode on the A7C II. Super 35 mode on modern cameras typically applies a 1.5x crop to the sensor:
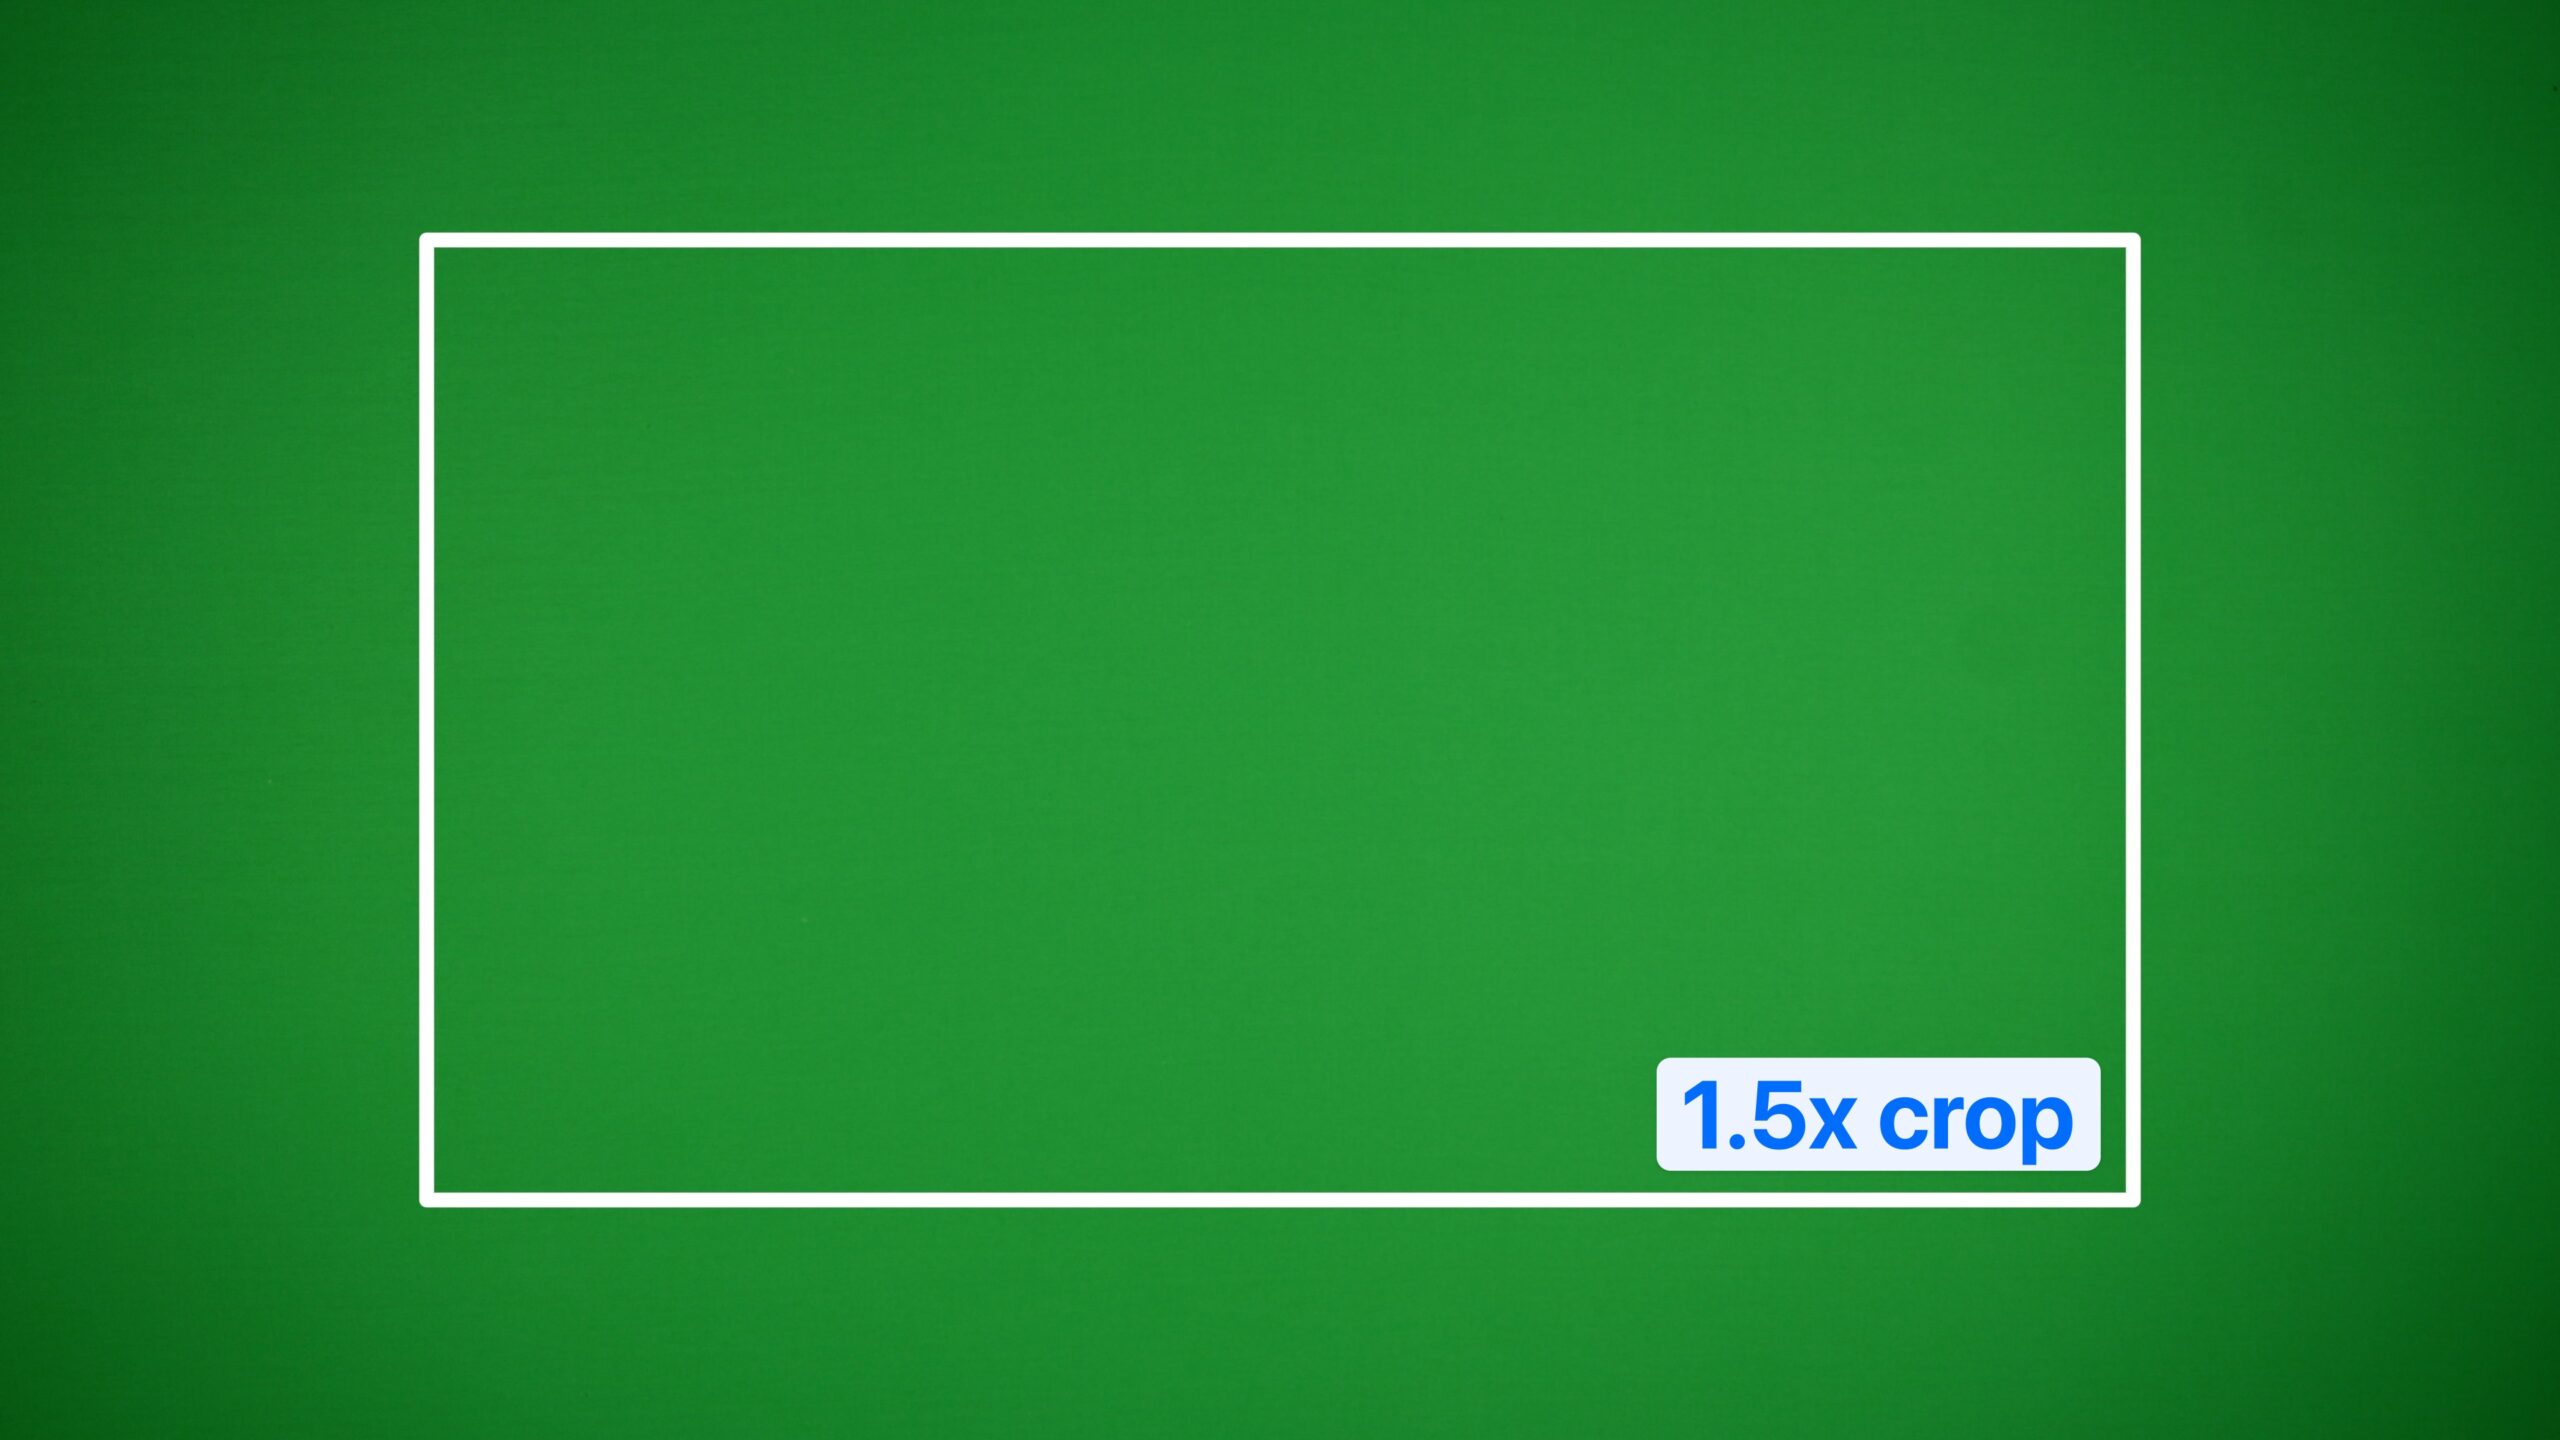
The resulting shot conveniently misses the vignetting, thereby circumventing the issue, making green screen removal much easier.
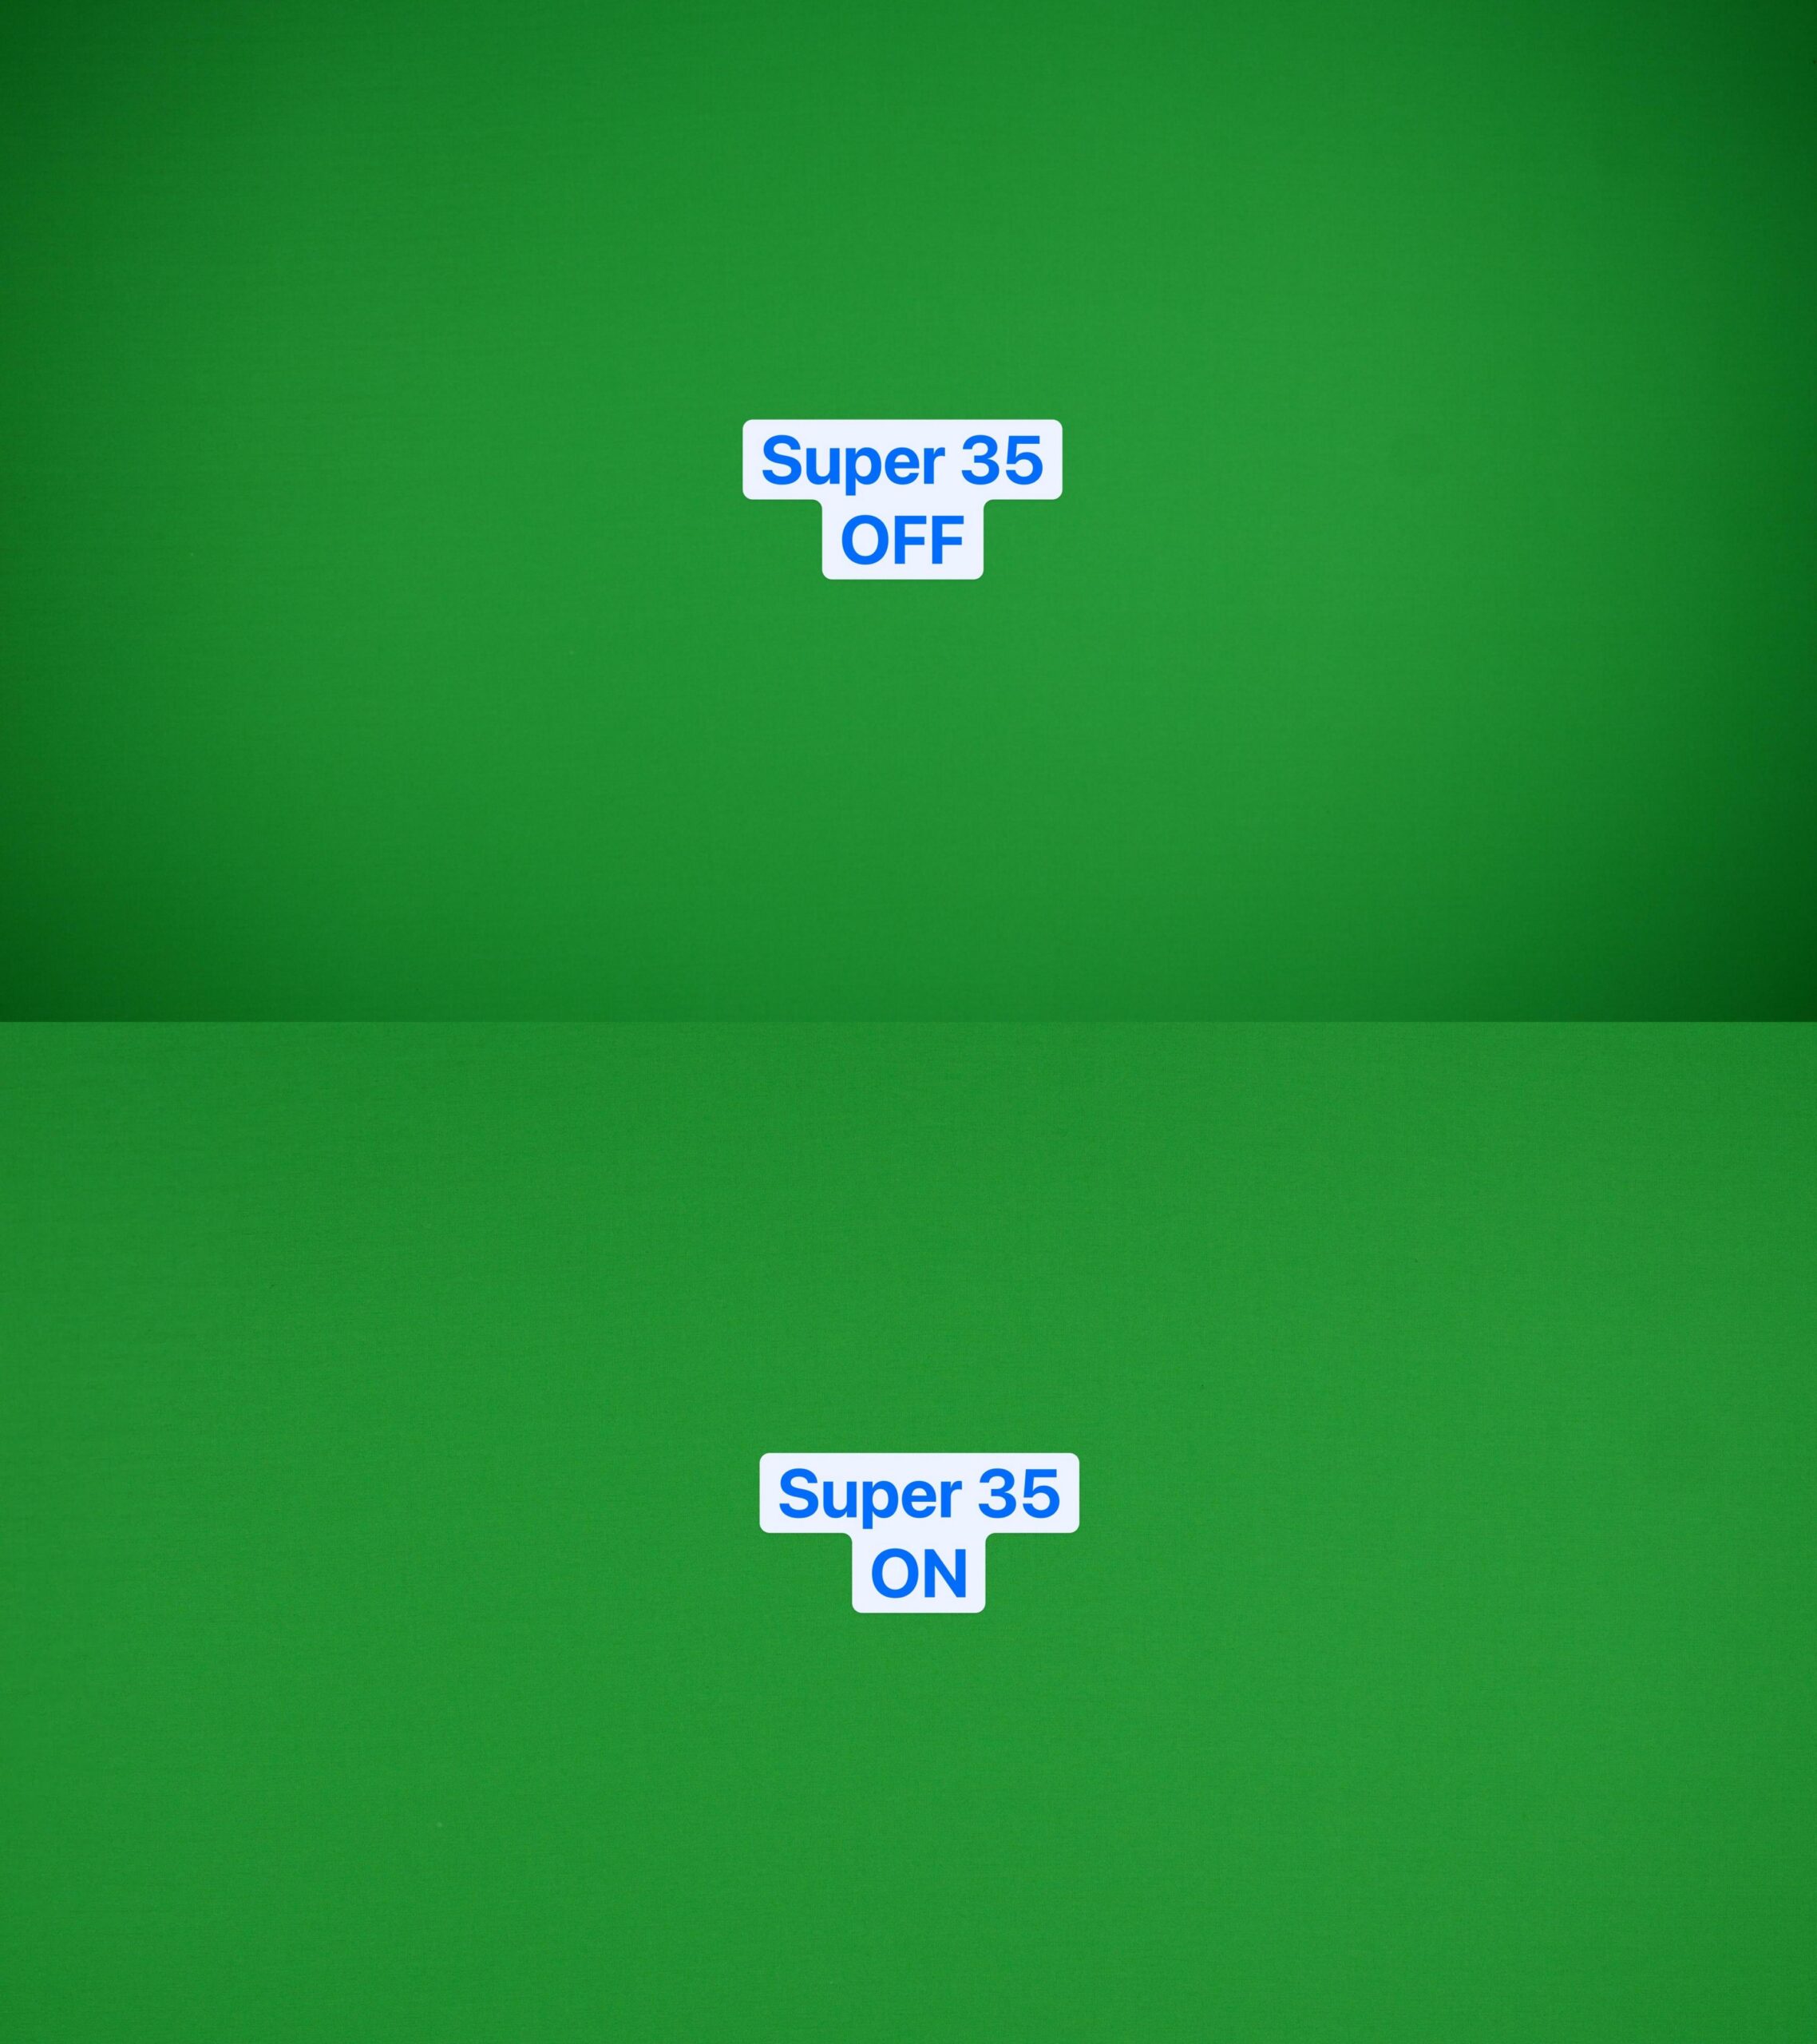
It’s worth noting that although Super 35 mode applies a crop on the sensor, there is typically no loss in resolution (in some cameras, it actually increases the resolution), so it’s not the same as cropping in post-production.
Want to create a video like this? ETO can help!
If you're interested in creating a talking head video like Professor Chong’s, either by yourself or in collaboration with the ETO, contact us at fase.edtech@utoronto.ca. We'd love to hear from you.